Are you ready to indulge in a sweet treat that’s easy and fun to make? These Chocolate Almond Butter Cups are all that and more! I’ll guide you through each step, from melting the chocolate to assembling these delicious cups. Whether you’re a novice or a pro in the kitchen, I promise you’ll love this simple recipe. Let’s dive in and create a tasty snack that everyone will crave!
Why I Love This Recipe
- Irresistible Flavor: The combination of rich dark chocolate and creamy almond butter creates a decadent treat that’s hard to resist.
- Quick and Easy: This recipe comes together in just 15 minutes, making it a perfect last-minute dessert.
- Customizable: You can easily adapt the toppings to your taste, whether you prefer nuts, sea salt, or coconut.
- Healthier Indulgence: Made with natural ingredients, these cups are a guilt-free way to satisfy your sweet tooth.
Ingredients
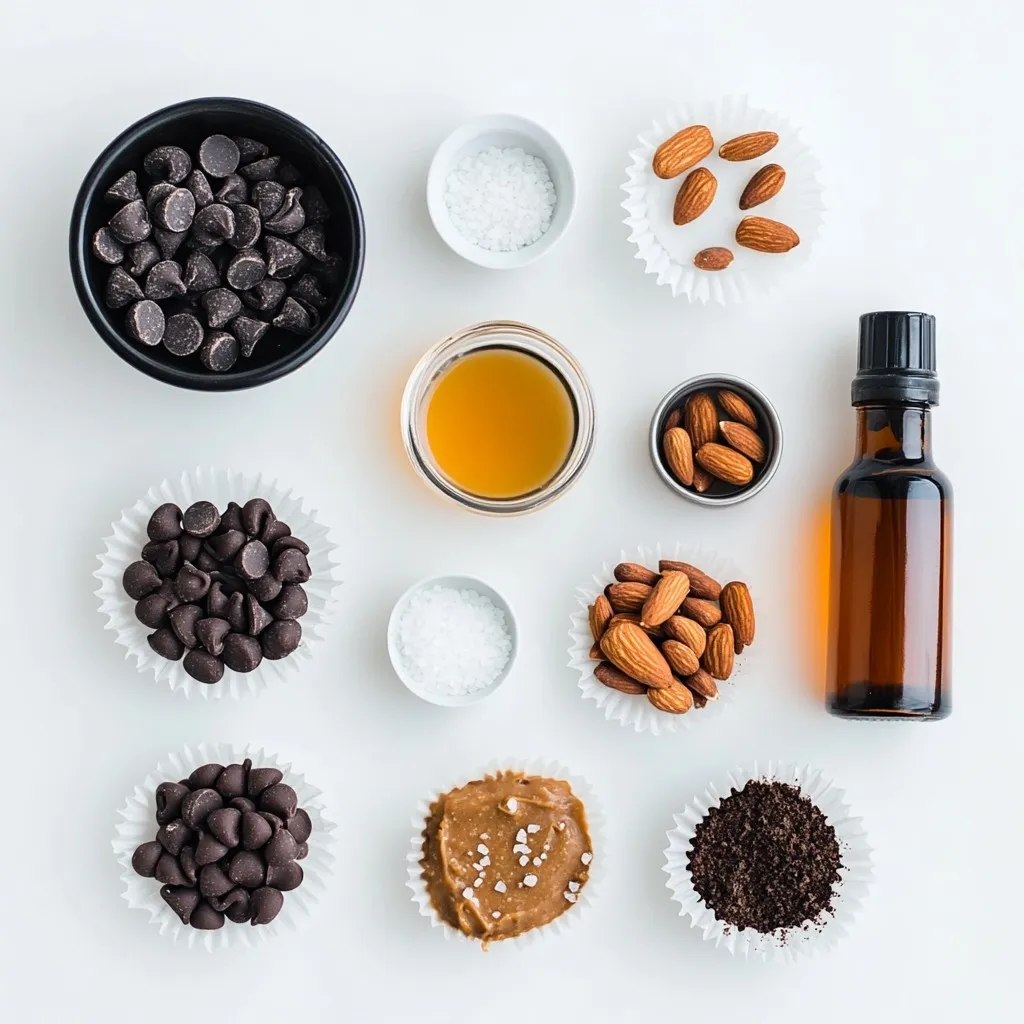
List of Ingredients
– 1 cup dark chocolate chips
– 1/2 cup almond butter
– 1 tablespoon maple syrup
– 1/2 teaspoon pure vanilla extract
– Pinch of sea salt
– Mini muffin liners (for cup molds)
Optional Toppings
You can make your Chocolate Almond Butter Cups even better with toppings. Consider these options:
– Crushed almonds
– Sea salt flakes
– Shredded coconut
Nutritional Information
These cups are not just tasty; they are also nutritious! Each cup has the following benefits:
– Dark chocolate offers antioxidants.
– Almond butter adds healthy fats and protein.
– Maple syrup provides a natural sweetness.
These treats are a great choice for a sweet snack or dessert!
Step-by-Step Instructions
Preparation of the Muffin Tin
First, grab a mini muffin tin. Line it with mini muffin liners. This step is key. It shapes your cups and makes it easy to remove them later. You will need 12 liners for this recipe.
Melting the Chocolate
Next, take 1 cup of dark chocolate chips. Place them in a microwave-safe bowl. Heat the chocolate in the microwave. Use 30-second intervals. Stir after each interval. Keep heating until the chocolate is smooth. Be careful not to overheat; it can burn easily.
Assembling the Cups
Now, scoop a small amount of melted chocolate into each liner. Use about 1/2 tablespoon per cup. This will be the base. Place the muffin tin in the freezer for about 10 minutes. While it cools, prepare the almond butter filling.
In a small bowl, mix 1/2 cup of almond butter, 1 tablespoon of maple syrup, 1/2 teaspoon of pure vanilla extract, and a pinch of sea salt. Stir until smooth. Once the chocolate base is set, take the tin out of the freezer. Add about 1 teaspoon of almond butter mixture on top of the chocolate in each cup. Spread it gently.
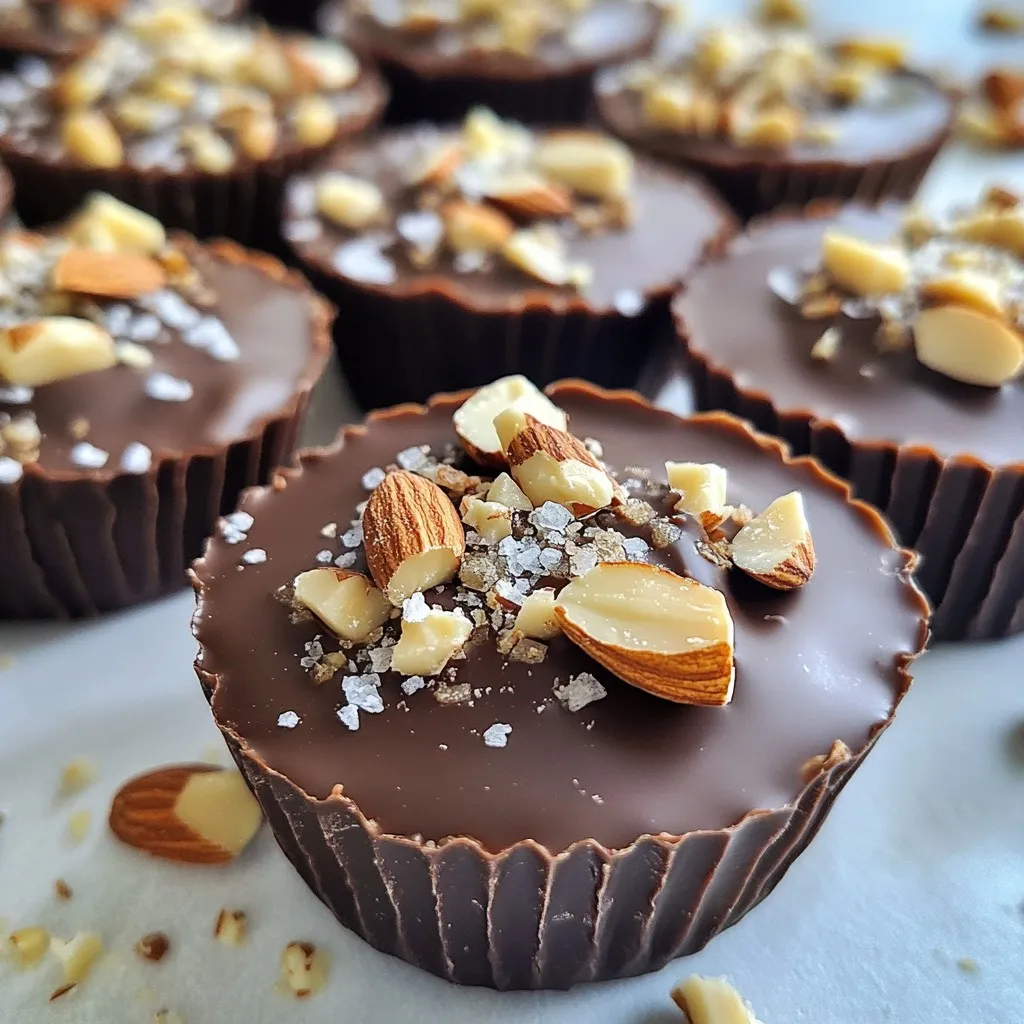
Now, pour another layer of the melted chocolate on top. Use about 1/2 tablespoon per cup to cover the almond butter. If you want, add toppings like crushed almonds or sea salt flakes.
Return the muffin tin to the freezer for another 30 minutes. This lets the cups set completely. Once set, peel away the muffin liners. Now you can enjoy your homemade Chocolate Almond Butter Cups!
Tips & Tricks
Common Mistakes to Avoid
When making Chocolate Almond Butter Cups, avoid these common mistakes:
– Overheating chocolate: Melt chocolate in short bursts. Stop when it looks shiny.
– Not using liners: Always line the muffin tin. This makes removal easy.
– Skipping the freezer: Let each layer set in the freezer. This keeps cups neat.
– Too much filling: Use just the right amount of almond butter. Too much spills out.
Best Practices for Chocolate Melting
Melting chocolate can be tricky. Here are my best tips:
– Use a microwave-safe bowl: This prevents the bowl from breaking.
– Go slow: Melt chocolate in 30-second bursts. Stir in between to check.
– Check the texture: Chocolate should be smooth and glossy. If it’s gritty, it’s burnt.
– Add a little fat: A tiny bit of coconut oil can help chocolate melt smoothly.
Serving Suggestions
These treats are fun to serve! Here are some ideas:
– Plate them nicely: Use a colorful plate to show off the cups.
– Add toppings: Top with crushed almonds or coconut for a fun crunch.
– Pair with drinks: Serve with milk or coffee for a tasty snack.
– Gift them: Wrap in a box with a ribbon for a sweet gift.
Pro Tips
- Use High-Quality Chocolate: The taste of your Chocolate Almond Butter Cups will significantly depend on the quality of the dark chocolate you choose. Look for chocolate with at least 70% cocoa for a rich flavor.
- Experiment with Flavors: Feel free to add different flavors to your almond butter filling, such as a pinch of cinnamon or a drop of almond extract, to enhance the overall taste of your cups.
- Store Properly: To keep your Chocolate Almond Butter Cups fresh, store them in an airtight container in the refrigerator. They will last for up to two weeks, but they are best enjoyed within the first few days.
- Customize Your Toppings: Get creative with your toppings! Try adding crushed nuts, seeds, or even a drizzle of caramel for a delightful twist on the classic flavor.
Variations
Vegan Chocolate Almond Butter Cups
You can easily make these cups vegan. Just swap dark chocolate chips for dairy-free chocolate chips. They melt just as well and taste wonderful. Use the same amount, one cup, for your recipe. The almond butter mix stays the same. You may also add a splash of plant-based milk to the almond butter. This makes it creamier and richer.
Gluten-Free Options
These Chocolate Almond Butter Cups are naturally gluten-free! The main ingredients, dark chocolate and almond butter, do not contain gluten. Just check your chocolate chips. Some brands may have added gluten. Make sure they are labeled gluten-free. This way, you can enjoy these treats without worry.
Flavor Variations
You can play with flavors to make these cups your own. Here are some easy ideas:
– Mint: Add a few drops of peppermint extract to the chocolate layer.
– Coffee: Mix in instant coffee granules into the almond butter for a coffee twist.
– Spicy: Add a pinch of cayenne pepper to the chocolate. This gives a nice kick!
– Coconut: Use coconut almond butter instead of regular almond butter for a tropical taste.
Feel free to mix and match these ideas. Each twist will give you a new treat to enjoy!
Storage Information
How to Store
To keep your Chocolate Almond Butter Cups fresh, store them in an airtight container. I recommend using a glass or plastic container with a tight lid. This keeps moisture out and helps them stay tasty. Place the container in a cool, dry place in your kitchen. Avoid direct sunlight or heat, as this can melt the chocolate.
Freezing Instructions
You can freeze these cups for later. First, place them in a single layer on a baking sheet. Freeze for about one hour until solid. Then, transfer the cups to an airtight container or a freezer-safe bag. Make sure to separate layers with parchment paper to prevent sticking. They can last up to three months in the freezer.
Shelf Life
When stored properly, Chocolate Almond Butter Cups last about one week at room temperature. If you keep them in the fridge, they can last for up to two weeks. Freezing them extends their life but remember to let them thaw before eating. Enjoy your treats fresh for the best taste!
FAQs
Can I use other nut butters?
Yes, you can use other nut butters. Peanut butter works well and is a great choice. Sunflower seed butter is also a good option for those with nut allergies. Each nut butter adds its own flavor. Experiment to find your favorite!
How do I make these cups sweeter?
To make the cups sweeter, add more maple syrup. Start with one extra tablespoon and mix well. You can also use honey as a sweetener. Taste the almond butter mixture after adding. Adjust until you find your perfect sweetness.
What can I substitute for chocolate chips?
You can use cocoa powder mixed with coconut oil. This mix gives a rich chocolate flavor. Another option is dark chocolate bars, chopped into small pieces. White chocolate is also an option for a different taste. Just make sure it melts smoothly!
You learned about making tasty chocolate almond butter cups from scratch. We discussed ingredients, optional toppings, and nutrition. I shared easy steps for preparation, melting chocolate, and assembly. You gained tips to avoid common mistakes and ensure top results. Variations for vegan and gluten-free cups let you customize. Plus, proper storage keeps your treats fresh longer.
Now, get creative and enjoy making these delicious cup