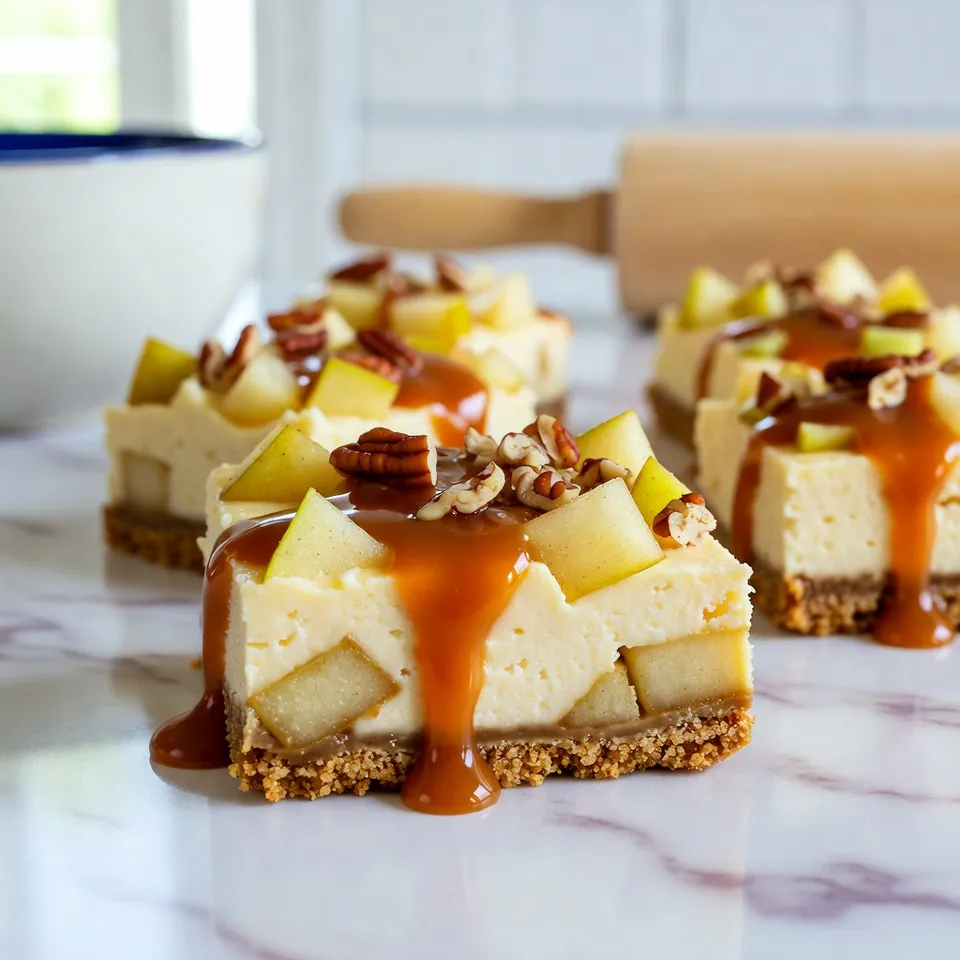
Craving a sweet treat that’s easy to make and simply delicious? Look no further! These Caramel Apple Cheesecake Bars are the ideal dessert delight. With a crunchy graham cracker crust, creamy cheesecake filling, and a decadent caramel drizzle, these bars will please any crowd. Whether you’re hosting a party or enjoying a quiet night at home, this recipe is a must-try. Let’s dive into how you can create this irresistible dessert!
Why I Love This Recipe
- Delicious Flavor Combination: The combination of creamy cheesecake, tart apples, and sweet caramel creates a delightful flavor profile that satisfies every craving.
- Easy to Make: With simple ingredients and straightforward steps, these cheesecake bars are perfect for both novice and experienced bakers.
- Perfect for Sharing: Cut into squares, these bars are easy to share at gatherings, parties, or potlucks, making them a crowd-pleaser.
- Make Ahead Option: These cheesecake bars can be prepared in advance and chilled, making them a convenient dessert option for busy days.
Ingredients
For the Crust
– 1 cup graham cracker crumbs
– 1/4 cup granulated sugar
– 1/2 cup unsalted butter, melted
For the Cheesecake Filling
– 16 oz cream cheese, softened
– 1/2 cup granulated sugar
– 2 large eggs
– 1 tsp vanilla extract
– 1/2 teaspoon cinnamon
– 1 medium apple, peeled and diced (preferably Granny Smith)
For the Caramel Topping
– 1/2 cup caramel sauce (store-bought or homemade)
– 1/4 cup chopped pecans (optional)
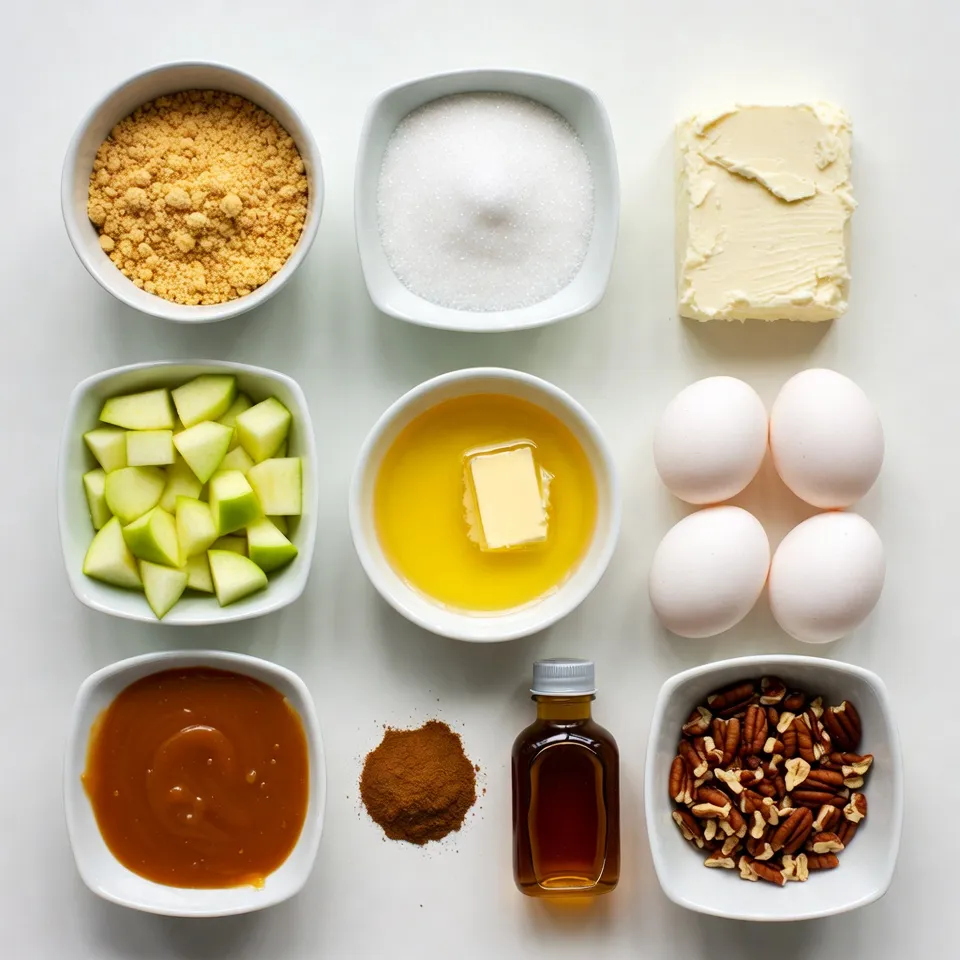
Gather these simple ingredients before you start. The crust blends graham cracker crumbs, sugar, and butter. You want a nice, firm base. The filling has cream cheese, sugar, eggs, vanilla, cinnamon, and diced apple. This mix gives you that creamy cheesecake taste with a fruity twist. Finally, the topping is all about caramel sauce and pecans if you choose. This adds sweetness and crunch. With these ingredients, you are on your way to making delicious caramel apple cheesecake bars!
Step-by-Step Instructions
Preheat and Prepare the Baking Pan
– Preheat the oven to 325°F (160°C).
– Line an 8×8 inch baking pan with parchment paper.
I always start by getting my oven ready. Preheating ensures even baking. Using parchment paper helps with easy removal later. Leave some overhang for lifting.
Make the Crust
– Combine graham cracker crumbs, sugar, and melted butter.
– Press mixture into the bottom of the pan.
For the crust, mix the graham cracker crumbs, sugar, and melted butter in a bowl. This mix should feel like wet sand. Press it firmly into the pan’s bottom. A solid layer makes for a great base.
Bake and Cool the Crust
– Bake for 10 minutes until golden.
– Let it cool while preparing the filling.
Bake the crust for about 10 minutes. You want it lightly golden. While it cools, you can start on the cheesecake filling. This wait builds flavor and texture.
Prepare and Bake the Cheesecake Filling
– Beat cream cheese and sugar until creamy.
– Add eggs, vanilla, cinnamon, and fold in the apple.
– Pour filling over the crust and tap to remove air bubbles.
– Bake for 25-30 minutes until set but jiggly.
In a big bowl, beat the softened cream cheese and sugar. Mix until smooth and creamy. Then, add eggs one by one, mixing well after each. Stir in vanilla and cinnamon. Finally, fold in the diced apple gently.
Pour the creamy mix over the cooled crust. Tap the pan on the counter to pop any air bubbles. Bake for 25-30 minutes. The center should be set but still have a slight jiggle.
Chill and Finish
– Cool in the oven for 1 hour with the door ajar.
– Refrigerate for at least 3 hours before adding the topping.
– Drizzle with caramel and top with pecans.
Once baked, cool the cheesecake in the oven for an hour. Keep the door slightly open. This prevents cracks. After that, chill in the fridge for at least three hours.
When ready, drizzle with caramel sauce. Add chopped pecans if you like. This adds a nice crunch and flavor boost.
Tips & Tricks
Best Practices for a Perfect Cheesecake
– Ensure cream cheese is softened for smooth mixing: This step helps to create a creamy filling. Cold cream cheese can lead to lumps.
– Avoid overmixing after adding eggs to prevent cracks: Mix just until combined. Too much air can cause cracks during baking.
Caramel Options
– Homemade vs. store-bought caramel sauce: Homemade caramel adds a rich touch. Store-bought is quick and easy. Choose based on your time and skill.
– Drizzling warmth for a perfect finish: Warm caramel drizzles beautifully. It flows smoothly over the bars, enhancing the look and taste.
Serving Suggestions
– Best served chilled or at room temperature: Chilling enhances the flavors and sets the bars firm. Room temperature brings out the taste of apples and caramel.
– Pair with ice cream or whipped cream for extra indulgence: A scoop of vanilla ice cream adds creaminess. Whipped cream provides a light touch. Try both for a dessert that shines!
Pro Tips
- Choose the Right Apple: For the best flavor and texture, use a tart apple like Granny Smith. It balances the sweetness of the cheesecake and caramel.
- Soften Your Cream Cheese: Ensure your cream cheese is at room temperature before mixing. This will help achieve a smooth and creamy filling without lumps.
- Cool Gradually: Allow the cheesecake to cool in the oven with the door ajar after baking. This gradual cooling helps prevent cracking on the surface.
- Chill Overnight: For the best texture, chill the bars overnight. This allows the flavors to meld and the cheesecake to firm up perfectly.
Variations
Flavor Enhancements
You can make your caramel apple cheesecake bars even better! Try using different apple types. Sweet apples like Honeycrisp add a nice twist. You might also enjoy tart apples like Fuji for a bold flavor. Adding spices can bring warmth and depth to the dish. Nutmeg gives a cozy feel, while ginger adds a pop of zest. Just a pinch can make a big difference.
Alternative Crusts
Want to switch things up? Consider using chocolate cookie crumbs for a fun twist. This adds a rich flavor that pairs well with the apples. If you’re gluten-free, try gluten-free graham crackers. They work perfectly and keep the texture just right. Don’t be afraid to get creative with your crust!
Different Toppings
Toppings can really elevate your bars. Drizzle some chocolate sauce for a sweet finish. It pairs beautifully with caramel and gives a nice contrast. You can also add whipped cream for a light touch. If you like a hint of salt, sprinkle some sea salt on top. This contrast can highlight the sweetness of the caramel and make each bite pop.
Storage Info
How to Store Leftovers
You can keep these bars fresh by refrigerating them. Place the bars in an airtight container. They will stay good for up to five days. If you add toppings, keep the layers separate. This helps maintain the texture and taste.
Freezing Instructions
If you want to save some for later, you can freeze them. Wrap each bar individually in plastic wrap. Place them in a freezer bag or container. They can last for up to two months. When you’re ready to enjoy them, thaw the bars in the refrigerator overnight.
Tips for Reheating
These bars are great chilled or at room temperature. If you prefer them warm, let them sit out for a bit. Avoid using the microwave to reheat. This can change the texture and make them less enjoyable.
FAQs
Can I make these bars ahead of time?
Yes, you can make these bars a day in advance. This helps the flavors meld together. Just store them in the fridge after they cool.
What should I do if my cheesecake cracks?
To avoid cracks, don’t overmix the batter. Mix just until smooth. After baking, let the cheesecake cool gradually in the oven. This helps keep it from cracking.
How can I substitute the cream cheese?
If you want a different taste, use mascarpone. You can also try a dairy-free alternative. Both options work well in this recipe.
Are these bars suitable for parties?
Absolutely! These bars are easy to slice and serve. They are crowd-pleasers, too, so you can wow your guests!
This cheesecake recipe combines a tasty graham cracker crust with creamy filling and sweet caramel. You now know the steps to make it, tips for success, and options for variations. Remember to keep it chilled for the best flavor. Enjoy making and sharing these delicious bars. They are not just treats; they are a great way to impress friends and family. Try different flavors and toppings to make it your ow